 Cookie settings
 Privacy policy.
 Login / Register
Ship modeling tutorial (Page 4 of 8)
Written by Killertide,
Now you can use the poligon option and UVW Map to texture that wing, it's in bad shape!
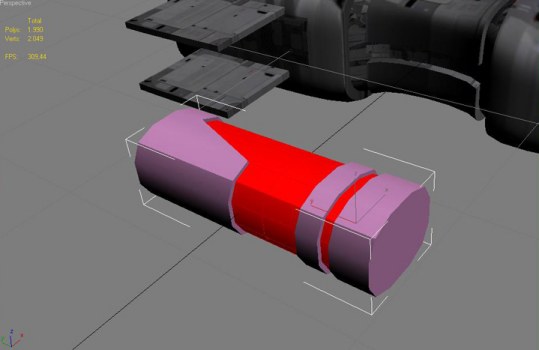
Next on the list is to make an engine, that's fairly simple to do. Just make another box with the following segs and we're good to go:
- Length 7
- Width 3
- Height 3
Using the vertex on the edges of the object, let's try to make the corners round like in the main ship. After that is done, let's make some more bevels in there, for some more detail. I've made this, do the same or like you wish.
Ok, let's texture the object, using the map system like in the main body, then add another texture to the beveled parts of the engine. I've made this:
You can use the bevel tool to make borders. Just make small bevels, one for width and the other for deapth. Seing that we all are learning something now, i decide to make a small challange: When you make the edjes, heither in the front or back side, you get a streched texture, like so:
This is by all means a bad work... It will not look good in X3, let's try and do this:
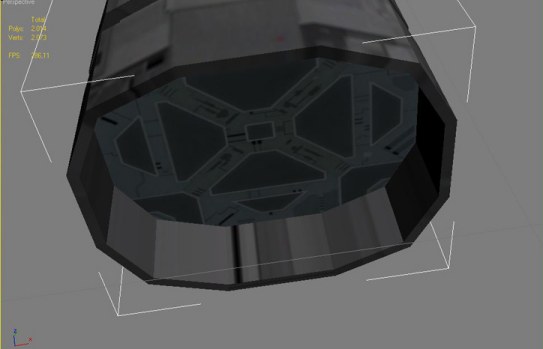
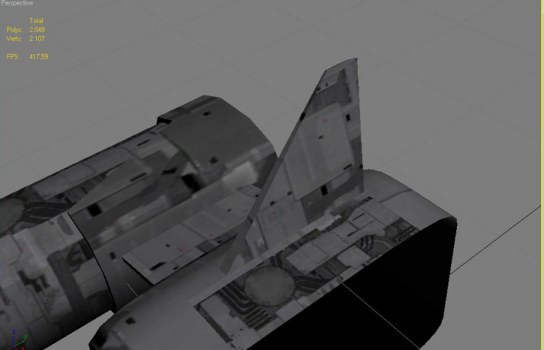
See? Much better! Remember to texture the engine intake and exaust, you'll find some good lighted textures at the end of the TL material list.
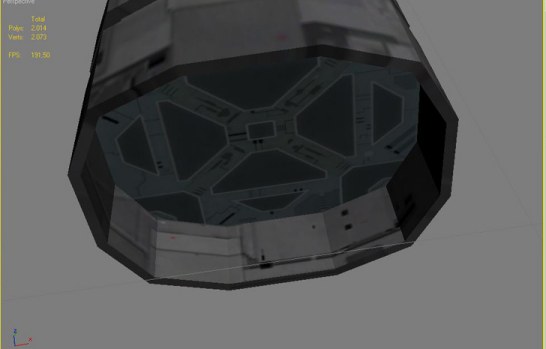
The above pic shows what i've done for intake, this is what i've done for exaust, try to do the same:
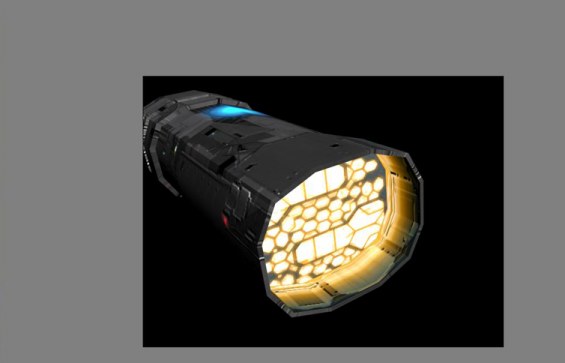
The above pic is a render, for all of you that don't know, click the F9 on the keyboard to see the rendered object, it's almost like seeing your ship in game.
Now, another small challange: Let's try and make a small wing on the top of the main body and fix it's textures. I've done something like this:
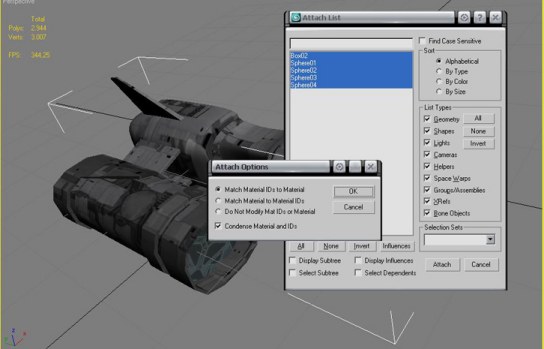
After that is done, place the two parts in the position that you wish them to be for the final ship and attach them, using the Element in the Modifeir menu aswell. Select the Element icon, then browse a bit down that same menu and select attach, next to it there's a small icon with tree dots (...) click it, select all, then attach. You will run into a pop up that will ask you how to attach, because of the materials, this is what you should choose:
Now let's make the mirror of the half ship. If you alredy centered the pivot point befor the half cut, you should get a fully perfect ship, if not, use the move tool to join the parts with perfection and to the above step again, at this time, you should have the ship almost ready.
Only the cockpit remains, but that's the easy part! I made the cockpit for this ship using a sphere. Create one, convert it to editable poli, select vertex, delete half of it and then import a texture into 3ds or Gmax from the dds folder. We're going to use a simple black texture, she will reflect like glass. The texture is the metal_argon_specialglass_diff.dds
For now let's make a bevel in the cockpit, then texture it, something like this:

For final touches you can add more parts, fill it up by taste so that she can please you too. When you're done, let's attach all the parts using the method we've used before, just like before.
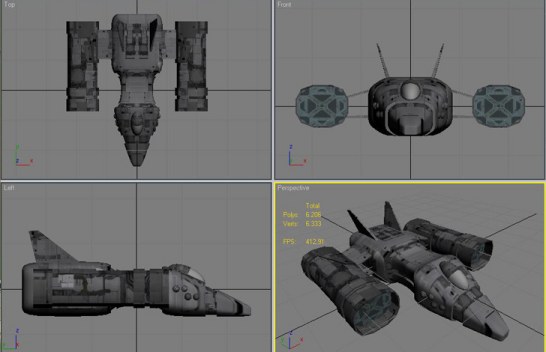
The ship is built now, and you should have something like this:
Let's name our ship! Pick a name (i'll use skyman for simplification purposes).
Now let's take her off 3ds max! In the utilities menu (same place that the create and modifie menu, the icon looks like a hammer) you have a function there that's called Collapse. Select the ship, select Collapse and tick the Modifier Stack Result, then select collapse selected. Now there's another one in the utilities menu called reset Xform, click it and select reset selected. Now in the Max script option, select Dbox and export the ship's bod to the desktop (or anywhere you feel it's best). Name the file EXACLY like you named it in 3ds or Gmax.
<< Previous Page - Next Page >>