Cookie settings
 Privacy policy.
 Login / Register
The upstairs project 2005 (Page 2)
After the panels were built under the periling to link it to the floor timbers of the upstairs - the 'A' frame I talked about earlier. After theses panels were built and installed they had to fibre glassed and put plaster board on both sides to trap the fibre glass in. The end where the home cinema system is to be installed as 19mm thick ply wood sheets on the wall. There are roughly 2 to 3 full sheets of ply on each side, rather than just plaster board. The ply is to help reforce the walls. The other end of the 'upstairs' (the bit without the home cinema) is spaced out the 19mm with off-cuts of the ply, as we havnt got enough to do all of the 'upstairs'. The walls without any fibre glass, ply and only one layer of plaster board are shown below:
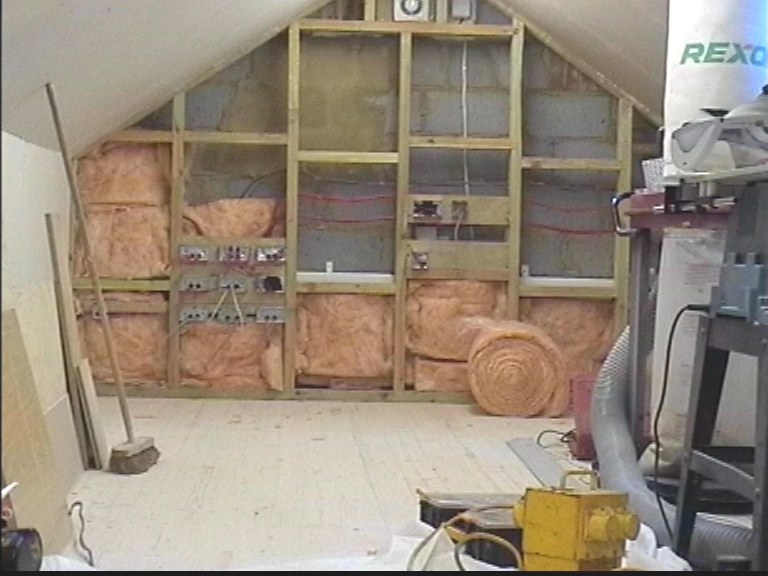
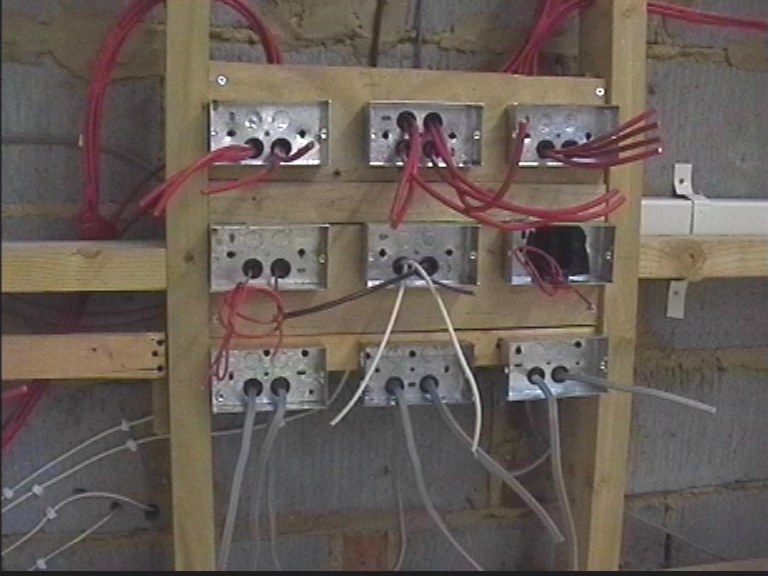
Once the walls were built for each side of the 'upstairs', the two end walls were re-worked on. A false wall was installed to basically take all the cables. This includes UHF (FM/TV), telephone, 7.1 surround sound speaker terminals, 5 power sockets (4 being double) and a tubing system installed to take any cables to the screen or the right side from the left side of the room where the receiver will be sitting. In the below picture you can see that the big red cable is the speaker ones, the top row of boxes are speakers, the second row are for data (left for sky if installed, middle for telephone, uhf etc. and the right is the tubing system. The tubing system is the big white pipe:
With this wall having all the cables installed it was time to fibre glass it, cover with the ply wood and then plasterboard over that. For those wondering what it looks like being done with fibre glass: