 Cookie settings
 Privacy policy.
 Login / Register
The upstairs project 2005 (Page 5)
Single speaker plates
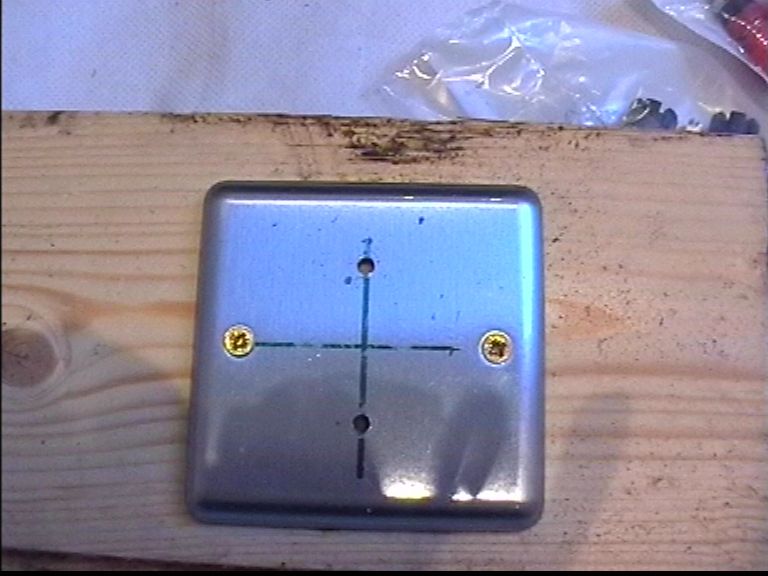
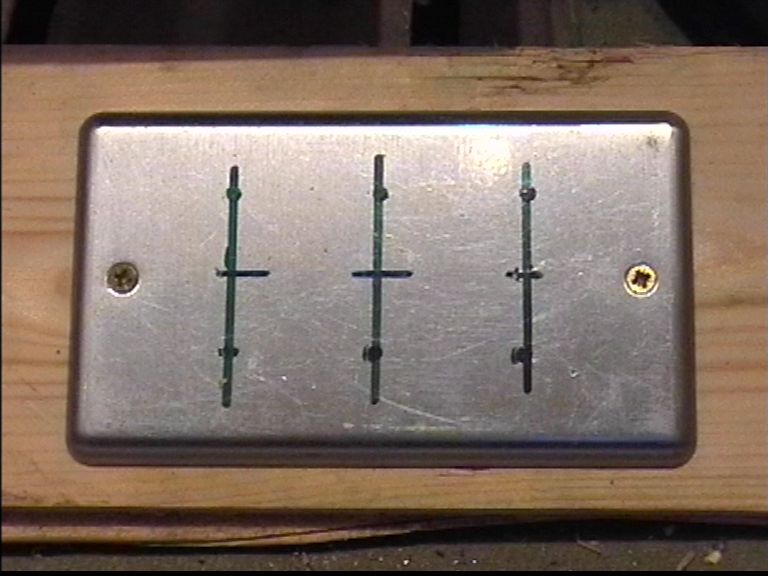
The first job of making the speaker plates are the single plates. The single speaker plates connect to one speaker. As an 7.1 system is being installed, 7 single plates will be required whist the sub woofer will be on its own cable and the other end of the single speaker will go to double plates at the front where the receiver/amp are.In order to make a single speaker plate up, I had to simply draw an across in the center of the plate (both horizal and vertically) with an pen which will not damage the plate and can be removed easy. With this cross on the plate its time to mark where the terminal post will be by measuring around 20mm above and below the vertial line. This is how an speaker an single plate looks when its marked and ready for drilling:
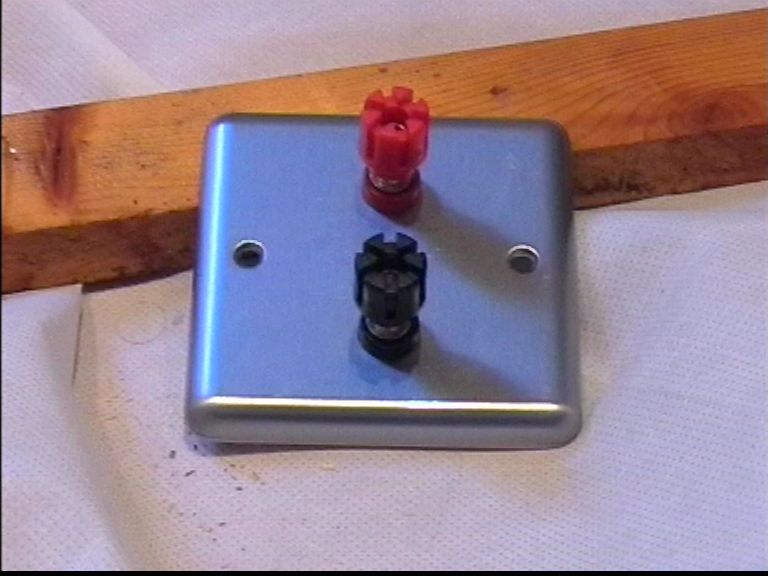
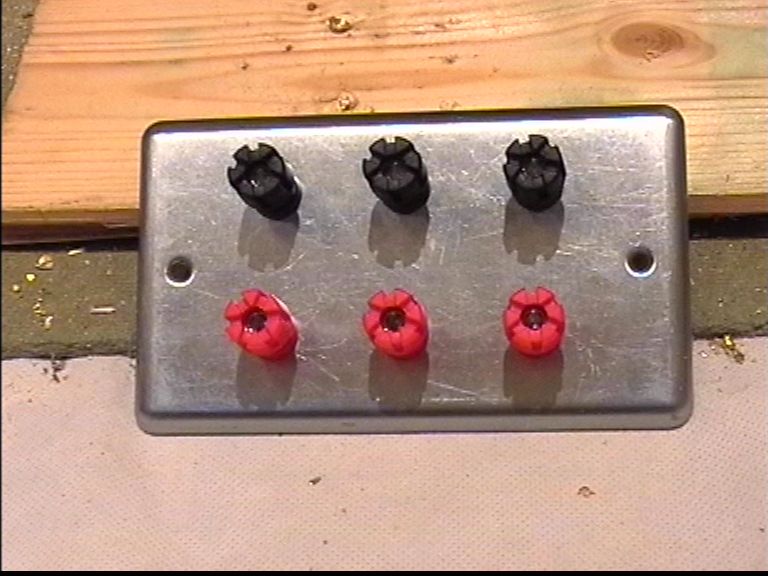
After that it must be drill out with an 7mm drill, and then an small slot cut into the plate as this stops the terminal post from turning. The plate will now need to be wiped with an damp cloth to remove the green pen lines from it. Once its been clean and cut its time to insert the terminal posts into the plate and bolt it up. An finished single speaker plate looks something like this:
Next they need to be installed on the walls. The cables being used in the internal walls is 10mm thick copper power cable. This size cable needs grip on it to screw to the back of the terminal post. Each terminal will have heat shrink protection around it to stop any shorting out of terminals. This is how an single plate looks like when being installed, just before the heat shrink protection is warmed:
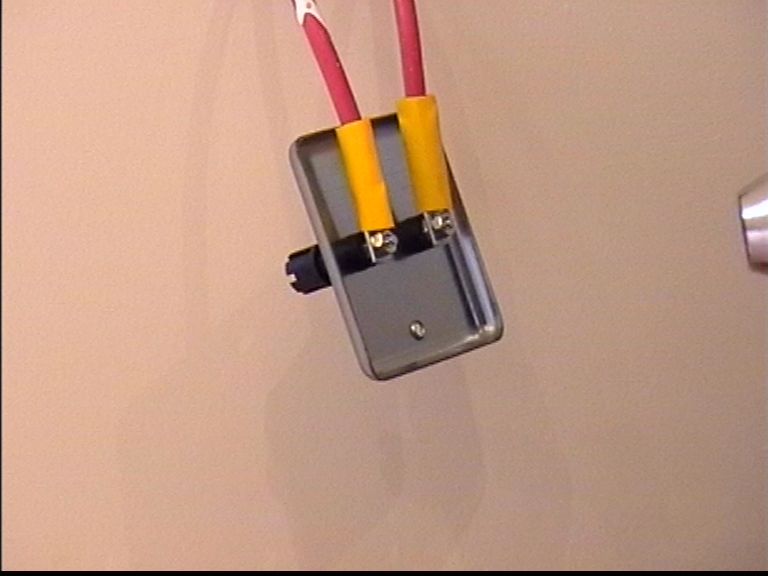
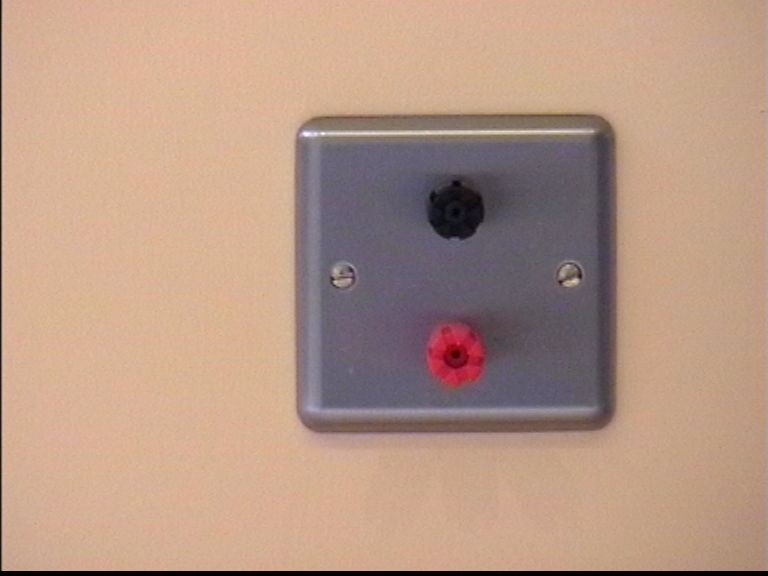
Now comes the job of pushing theses two 10mm cables back in order to screw the plate on the wall. This can be a little of a battle sometimes however this is how the end result looks:
Double speaker plates
Now its onto the more complex double plates which will be installed at the front of the upstairs. At the front there will be 3 double plates which will do rear left, front and rear right speakers. So basically there will be 2 set of speakers on the left double plate (rear left, far left), 3 sets of speakers on the middle double plate (left, centre, right) and then finally 2 set of speakers on the right double plate (rear right, far right).As you can guess the most complex double plate will be the middle one with 3 sets of speaker terminal posts. Again I have to mark on the plate where the terminal posts will go, this looks something like this:
Then the plate is drilled and once again and then holes are slotted for terminal post to be installed. The post are then installed making the plate complete and ready to be installed on the wall at the front. This is how an finished plate looks like:
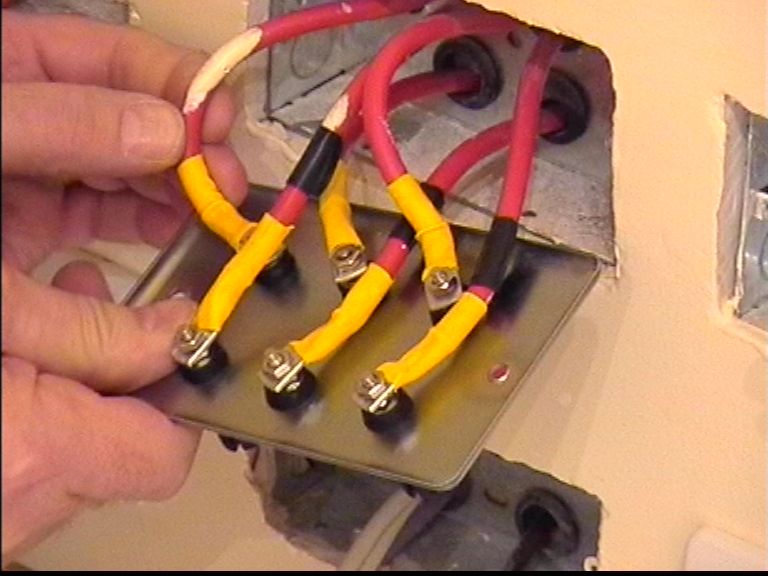
Next comes the hard job of getting all the 10mm cables gimp and screwed to the back of the posts. Each cable also needs heat shrink around it to again stop any short circuits. This is how it looks like before the double middle plate is pushed back (which is one big battle):
The other 2 double plates are a lot easier to make, as they only need two sets of speaker terminals on then so there is a lot more space inside the box. They are all built like the others and then finalled installed on the walls. The speaker plates are now ready for some speakers to be fitted to them.